After building your PC, the final and crucial step is installing an operating system. In 2025, Windows 11 is the most popular choice for gaming, productivity, and general use.
This step-by-step guide will help you install and configure Windows 11 safely, whether you’re starting from scratch or upgrading from a previous system.
What You Need Before You Begin
✅ Minimum System Requirements for Windows 11 (2025):
- 64-bit processor with 1GHz+ and 2+ cores
- 4GB RAM (8GB or more recommended)
- 64GB storage
- UEFI firmware with Secure Boot
- TPM version 2.0
- DirectX 12-compatible GPU
🛠️ Tools You’ll Need:
- A working PC with internet access
- A USB flash drive (at least 8GB)
- A Windows 11 ISO file or the Media Creation Tool
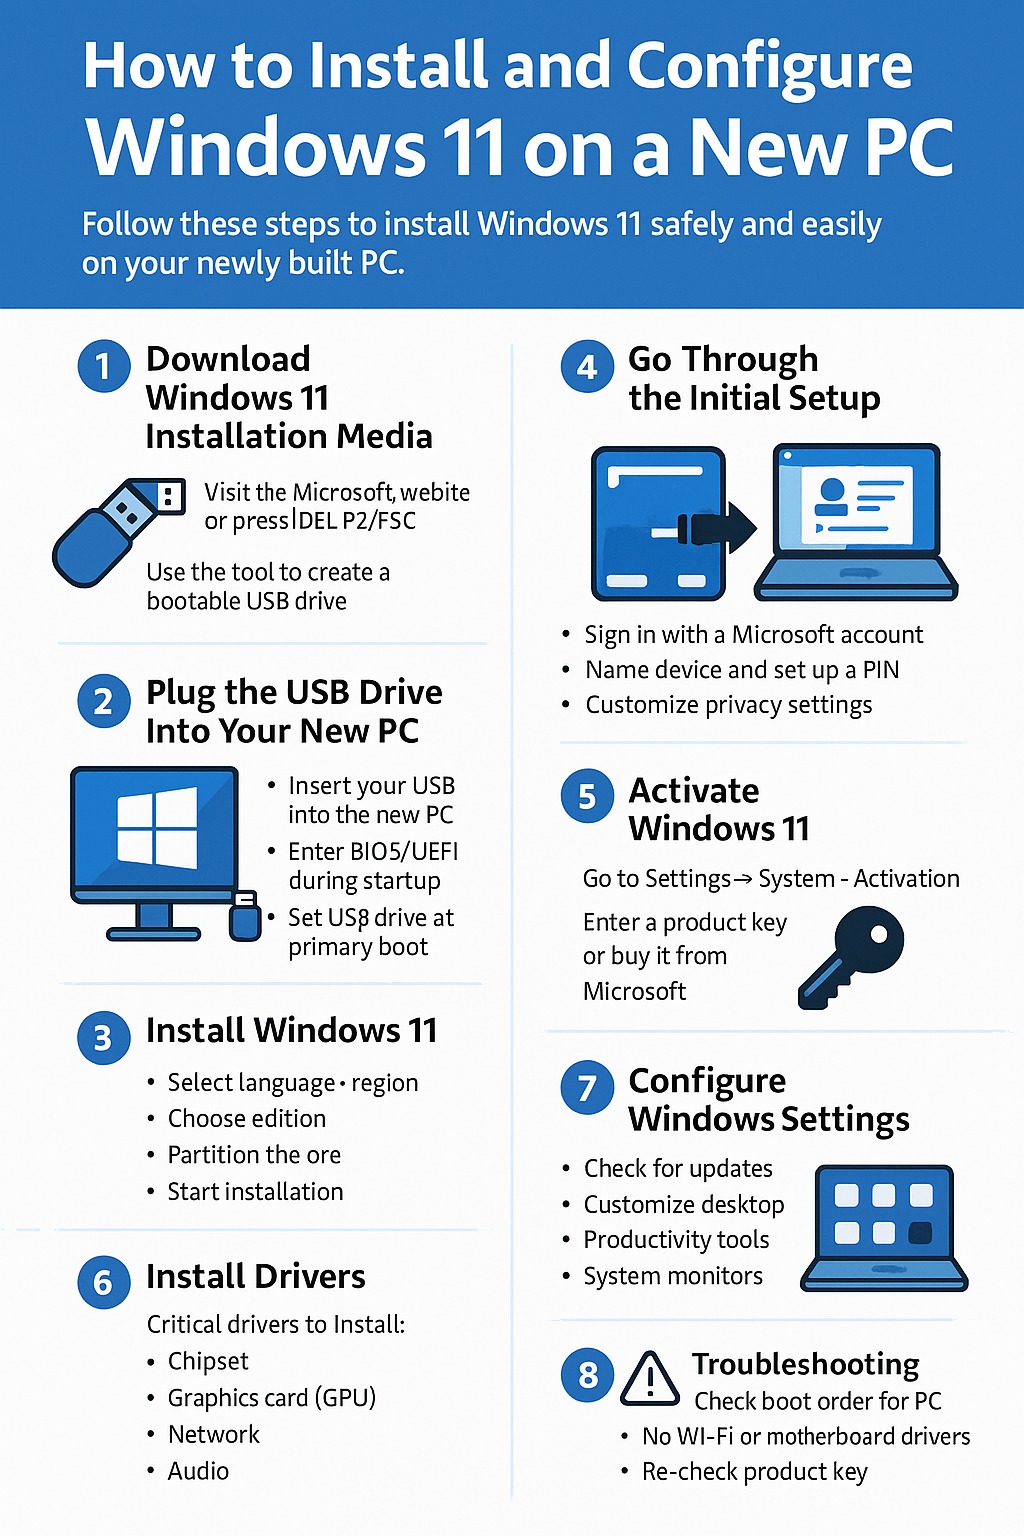
Step 1: Download Windows 11 Installation Media
- Visit Microsoft’s official website:
https://www.microsoft.com/software-download/windows11 - Download the Media Creation Tool or the ISO file.
- Use the tool to create a bootable USB drive:
- Plug in the USB drive
- Run the tool and follow the steps
- Choose “Create installation media for another PC”
- Select language, edition, and architecture (64-bit)
Step 2: Plug the USB Drive Into Your New PC
- Insert the USB into your freshly built PC.
- Power it on and enter BIOS/UEFI by pressing
DEL,F2, orESCduring startup. - Set the USB drive as the primary boot device in the boot order menu.
Step 3: Install Windows 11
- After reboot, the PC will boot from USB.
- Select your language, time, and keyboard layout.
- Click Install Now.
- Enter your product key or skip (you can activate later).
- Choose Windows 11 Home or Pro, depending on your needs.
- Select Custom: Install Windows only (advanced).
- Choose the SSD/HDD where Windows will be installed.
- Delete all partitions if it’s a new disk and click Next.
Windows will now begin installing. The process takes 10–30 minutes depending on your drive speed.
Step 4: Go Through the Initial Setup
After installation:
- Choose your region and keyboard layout.
- If connected to Wi-Fi, sign in with a Microsoft account (required for Home edition).
- Name your device.
- Set up a PIN for secure login.
- Configure privacy settings (telemetry, location, etc.).
- Choose whether to restore from another PC or start fresh.
Step 5: Activate Windows 11
Go to:
Settings → System → Activation
- If you entered a valid product key earlier, activation should be automatic.
- If not, click “Change product key” and enter it manually.
You can buy a key from Microsoft or authorized resellers.
Step 6: Install Drivers
🧩 Critical drivers to install:
- Chipset drivers (motherboard website)
- GPU drivers (NVIDIA, AMD, or Intel)
- LAN/Wi-Fi drivers
- Audio drivers
- Storage controller drivers (NVMe) if needed
Most drivers are automatically installed via Windows Update, but it’s best to install the latest versions manually from the manufacturer.
Step 7: Configure Windows Settings
- Check for updates:
- Go to Settings → Windows Update
- Download and install all recommended updates
- Customize your desktop:
- Change wallpaper, themes, taskbar position
- Install useful apps (web browser, file manager, etc.)
- Security Setup:
- Enable Windows Defender or install third-party antivirus
- Turn on BitLocker (Pro edition) for drive encryption
Optional: Debloat Windows 11
Windows 11 comes with pre-installed apps you may not need.
You can remove them using:
- Settings → Apps → Installed Apps
- PowerShell scripts (only recommended for advanced users)
- Free tools like O&O AppBuster or Win10Debloater
Step 8: Install Essential Software
For a new PC, consider installing:
- Web browser (Chrome, Firefox, Brave)
- Gaming platforms (Steam, Epic Games, Xbox App)
- Productivity tools (Microsoft Office, Notion, OneNote)
- Cloud storage (OneDrive, Google Drive, Dropbox)
- Media players (VLC, Spotify)
- System monitoring tools (HWMonitor, CPU-Z, MSI Afterburner)
Troubleshooting Tips
| Problem | Solution |
|---|---|
| PC won’t boot from USB | Check boot order in BIOS and reformat USB drive |
| No Wi-Fi or sound | Install motherboard drivers manually |
| Windows won’t activate | Double-check your product key or try later |
| Blue screen after install | Update drivers and check for hardware issues |
Final Thoughts
Installing Windows 11 is the final piece in your PC build puzzle. Once it’s complete, you’re ready to enjoy everything your new machine has to offer — from high-performance gaming to creative work.
Take the time to customize your setup, install only what you need, and keep your system updated. A clean, well-configured Windows install sets the stage for a fast, stable, and productive PC experience.