Building a PC from scratch can be one of the most rewarding and empowering tech experiences. Whether you’re setting up a gaming rig, a workstation, or a general-purpose computer, understanding the components and process gives you total control over your machine’s performance, cost, and aesthetics.
In this guide, we’ll walk you through every essential step, from choosing components to powering on your new system for the first time.
Why Build Your Own PC?
Building your own PC comes with a number of benefits:
- Cost-effectiveness: You can often get better performance for the price.
- Customization: Choose every detail — from processor to RGB lighting.
- Knowledge: Learn how each component works and how to troubleshoot issues.
- Upgradability: Tailor your build for future expansion or performance boosts.
What You’ll Need Before You Start
Here’s a checklist of what you should have before diving in:
- A clean, static-free workspace
- A Phillips-head screwdriver
- A magnetic tray (optional, but useful for screws)
- Access to an anti-static wrist strap or anti-static mat
- All of your PC components (detailed below)
The Core Components You Need
Each of these parts is essential for your PC to function:
1. CPU (Central Processing Unit)
The brain of the computer. Choose between Intel and AMD based on your budget and performance needs.
2. Motherboard
The central hub that connects all components. Ensure it’s compatible with your chosen CPU and supports the features you need.
3. RAM (Memory)
Essential for multitasking and application performance. Most systems need at least 16GB for smooth performance in 2025.
4. Storage (SSD/HDD)
Use an NVMe SSD for your operating system and essential programs — it’s blazing fast. You can add HDDs or SATA SSDs for additional storage.
5. Power Supply Unit (PSU)
Provides power to all components. Choose a high-quality unit with enough wattage and 80 Plus certification for efficiency.
6. Graphics Card (GPU)
Crucial for gaming, design, video editing, and other graphic-intensive tasks. Not all builds require one if using integrated graphics.
7. Case (Chassis)
Houses all components and dictates airflow. Make sure it supports your motherboard size (ATX, Micro-ATX, etc.) and cooling preferences.
8. Cooling System
Can be stock coolers, air coolers, or liquid coolers. Good airflow prevents overheating and extends your PC’s lifespan.
9. Monitor, Keyboard, and Mouse
While not technically part of the build, they are essential peripherals to use the system once assembled.
Step-by-Step: How to Assemble Your PC
Step 1: Install the CPU on the Motherboard
- Open the CPU socket lever.
- Align the CPU notch with the socket and gently place it in.
- Lock it in place without force.
Step 2: Install RAM
- Open the RAM slots on the motherboard.
- Align the notch and press until it clicks. Dual-channel configuration is ideal.
Step 3: Install M.2 NVMe SSD (if applicable)
- Find the M.2 slot.
- Slide the SSD in at an angle and secure it with a small screw.
Step 4: Place the Motherboard into the Case
- Align with the standoffs and rear I/O shield.
- Screw it in carefully without overtightening.
Step 5: Install the Power Supply
- Mount the PSU in the designated space (usually bottom rear).
- Route the cables through the back panel if the case allows.
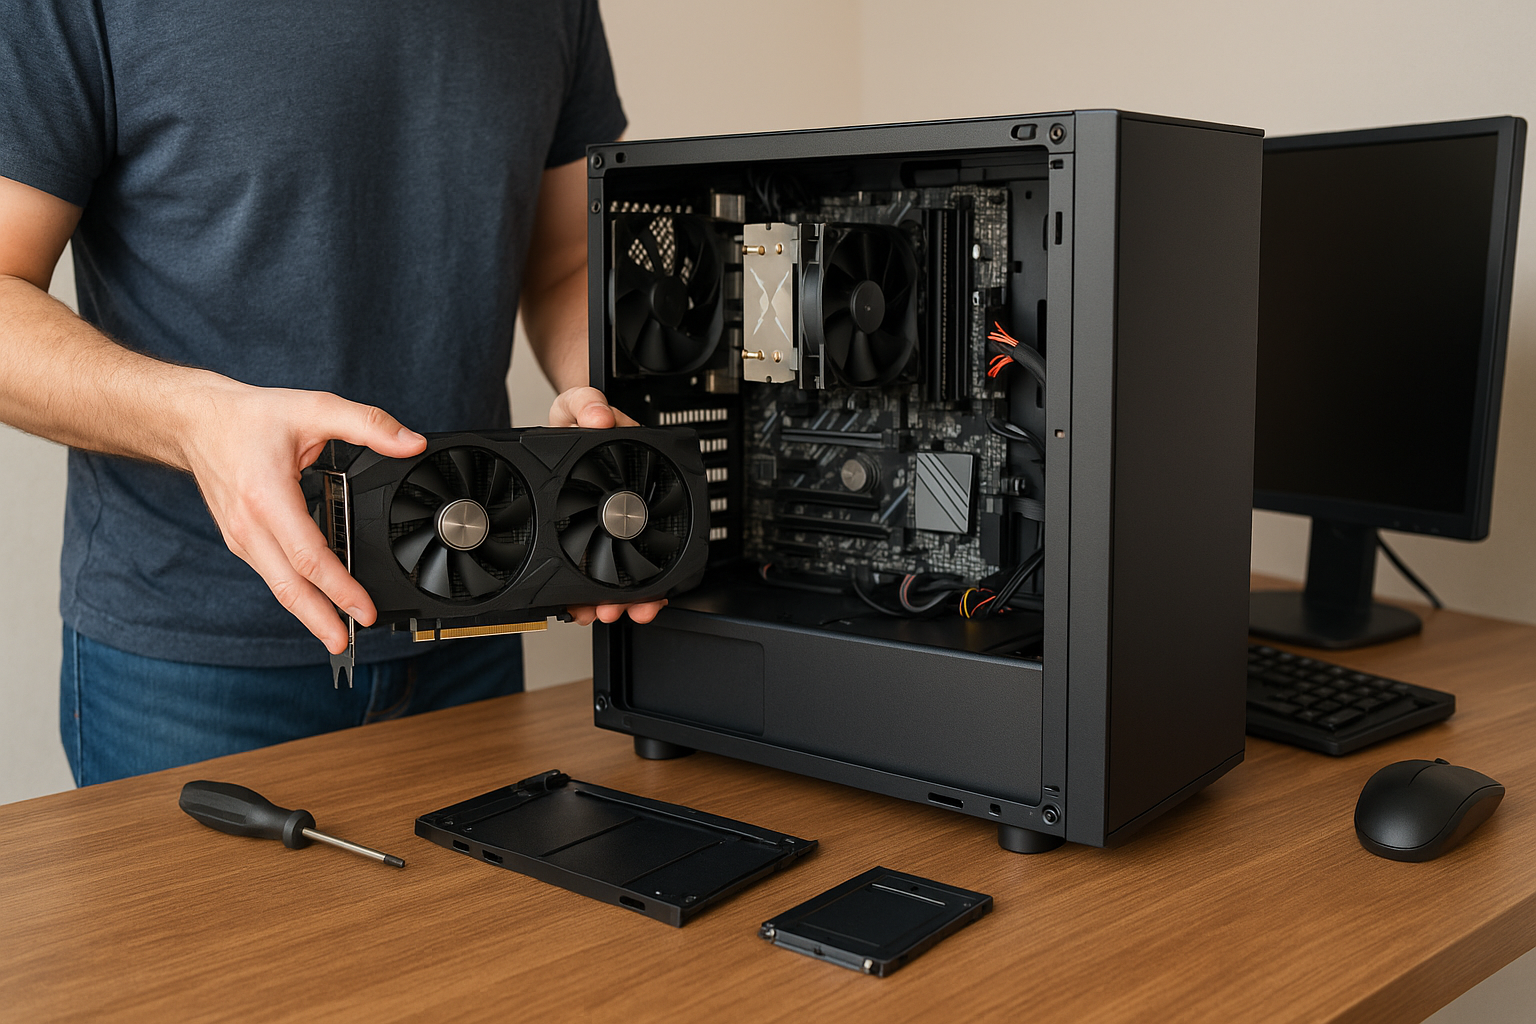
Step 6: Install the GPU
- Remove PCIe slot covers on the case.
- Insert the GPU into the top PCIe x16 slot.
- Secure with screws and connect power cables if needed.
Step 7: Connect All Power and Data Cables
- Connect 24-pin and 8-pin CPU power cables.
- Attach SATA cables for hard drives.
- Plug front panel connectors (power button, USB ports, audio jacks).
Step 8: Cable Management
- Use zip ties to keep cables organized and airflow unobstructed.
- Tidy cables behind the motherboard tray for a clean look.
Step 9: Final Check and Power On
- Double-check all connections.
- Plug in the power cable, monitor, keyboard, and mouse.
- Turn on the power — if everything is correct, you’ll see the BIOS/UEFI screen.
What to Do After Booting Up
- Access BIOS: Configure boot order and make sure your components are recognized.
- Install Operating System: Use a USB drive to install Windows, Linux, or another OS.
- Install Drivers: Get the latest drivers from manufacturer websites.
- Update BIOS (optional): Only if necessary and if you’re confident.
Troubleshooting Tips
If your system doesn’t boot:
- Reseat the RAM and GPU
- Check all power connectors
- Listen for beep codes or error lights
- Try booting with minimal components
Tips for a Smooth First Build
- Take your time. Rushing increases chances of mistakes.
- Watch video tutorials alongside this guide if it’s your first time.
- Double-check compatibility before purchasing parts.
- Invest in a quality PSU — it powers everything.
- Avoid static discharge by grounding yourself or using an anti-static wristband.
Final Thoughts: Why It’s Worth It
The first boot of a PC you built yourself is a uniquely satisfying moment. Not only do you save money, but you also gain a deep understanding of how computers work. This knowledge can lead to better tech decisions, easier upgrades in the future, and even a path into IT or gaming professions.